Best Food
nice food
healty Food

Saturday, July 7, 2007

About Green Tea Extract

A green tea extract is produced from the leaves of a plant camellia sinensis. These teas have undergone minimal processing during their manufacture. Green tea is now a worldwide phenomenon being very popular in several countries. Countries originally producing green tea are China and Japan.

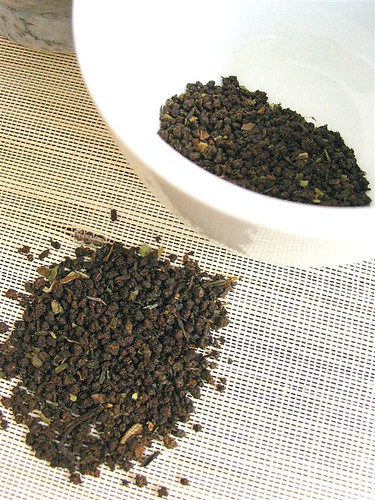
Green tea extract is a fine brown yellowish powder having a typical smell. These powders are soluble in water and ethanol. The green tea extracts are polyphenols and catechins.

Catechins are green tea extracts which have high biochemical activity. Catechins are also called polyphenols or tannins. A catechin, which has high antioxidant property, is Epigallocatechin gallate (EGCg). The antioxidant property of these chemicals is much more than either vitamin C or vitamin E. Catechins have several medicinal properties. They inhibit the proliferation and development of aberrant cell colonies in the body. It is known that proliferation of aberrant cell colonies give rise to cancer. They inhibit oxidation of cholesterol and low-density lipoproteins. The American journal of Nutrition has found out in its research that catechins decrease the oxidative damage of cells and DNA due to exposure to iron. The green tea extract has been attributed in weight loss in humans. Obesity is a major worldwide epidemic that is spreading at an alarming rate. Bad food habits and sedentary lifestyle is the main cause for obesity. Obesity can set in at any age in humans. It is the major cause for several diseases. Weight can be reduced in two steps. First, regulate the excess calorie intake. Second, is to burn the body fat. Green tea has been found to possess both these properties. It not only reduces the amount of calories that is entering the body but also aids in body fat burning by increasing the metabolism. People suffering from hypothyroidism face problems to burn down the fats as they have a low metabolic rate. Green tea is beneficial for such patients.

There was a myth that the caffeine content in tea increases metabolism. However, recent studies have shown it is not in the caffeine but in the green tea (catechins) that aid in fat burning. They suppress the secretion of several digestive enzymes limit the absorption of sugar.

The green tea extracts that is the catechins have properties, which inhibits uncontrolled cell growth, and thus prevent cancer. In countries such as China where the consumption of green tea is the highest, it has been observed that the cancer rates are significantly lower. They have antibacterial properties too inhibits food poisoning bacteria which causes botulism (food poisoning). They also inhibit several types of pathogenic microbes. The green tea extracts helps in glowing of the skin, prevent the formation of wrinkles and protect them from the harmful effects of ultra-violet (UV) rays.

These extracts also mask the smell of bad breath. After all, unhealthy lifestyle produces bad breath. Imagine that you are in a business meeting of high merits and you emit foul smell from your breath! This will affect not only your professional life but also your personal life. You will not only be avoided and shunned by your colleagues but also your friends, if you have bad breath!

Green tea extract contains natural caffeine. While processing this caffeine should not be removed. Otherwise, the beneficial effects of the green tea extract will be lost. A standard green tea extract should contain 91.2 % polyphenols and 54.5% EGCG.

Therefore, next time when you buy green tea, make sure you have all the standards present. Enjoy the taste of the beverage and lead a disease free healthy life.

Green Tea Extracts and green tea have been very popular these last few years, learn about the benefits of green tea and how it can improve you health and wellbeing, learn more about Tea at http://teaonesite.com

Monday, May 28, 2007

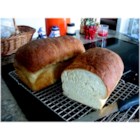
Amish White Bread

Original recipe yield:
2 - 9x5 inch loaves
PREP TIME 20 Min
COOK TIME 40 Min
READY IN 2 Hrs 30 Min


INGREDIENTS

  • 2 cups warm water (110 degrees F/45 degrees C)
  • 2/3 cup white sugar
  • 1 1/2 tablespoons active dry yeast
  • 1 1/2 teaspoons salt
  • 1/4 cup vegetable oil
  • 6 cups bread flour

DIRECTIONS

  1. In a large bowl, dissolve the sugar in warm water, and then stir in yeast. Allow to proof until yeast resembles a creamy foam.
  2. Mix salt and oil into the yeast. Mix in flour one cup at a time. Knead dough on a lightly floured surface until smooth. Place in a well oiled bowl, and turn dough to coat. Cover with a damp cloth. Allow to rise until doubled in bulk, about 1 hour.
  3. Punch dough down. Knead for a few minutes, and divide in half. Shape into loaves, and place into two well oiled 9x5 inch loaf pans. Allow to rise for 30 minutes, or until dough has risen 1 inch above pans.
  4. Bake at 350 degrees F (175 degrees C) for 30 minutes.

Friday, May 25, 2007

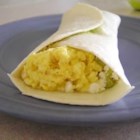
Easy Egg and Avocado Breakfast Burrito

Original recipe yield:
4 servings
PREP TIME 15 Min
COOK TIME 10 Min
READY IN 25 Min

INGREDIENTS

  • 6 eggs
  • 1/3 cup milk
  • 1/4 cup shredded Cheddar cheese
  • salt to taste
  • 2 avocados - peeled, pitted, and mashed
  • 4 (10 inch) flour tortillas, warmed
  • 2/3 cup dry curd cottage cheese
  • 1/4 cup ketchup

DIRECTIONS

  1. In a bowl, beat together the eggs, milk, and cheese. Season with salt. Pour into a skillet over medium heat. Cook and stir until scrambled.
  2. Season mashed avocados with salt. Place tortillas one at a time in a separate skillet over medium heat, and cook just until warm. Spread equal amounts of the avocado mixture on one side of each warmed tortilla. Layer with equal amounts cottage cheese and scrambled eggs. Roll into burritos and serve with ketchup.

Wednesday, May 23, 2007

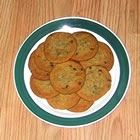
Toffee Chocolate Chip Cookies

INGREDIENTS
1 cup packed brown sugar
1/2 cup butter, softened
1/2 cup shortening
1/4 cup white sugar
1 egg
2 cups all-purpose flour
1 teaspoon baking soda
1/2 teaspoon baking powder
1/4 teaspoon salt
2 cups mini semi-sweet chocolate chips
1 (6 ounce) package almond brickle chips
1 teaspoon vanilla extract
DIRECTIONS
Preheat oven to 350 degrees F (175 degrees C).
Mix sugars, margarine and shortening until light and fluffy. Mix in egg and vanilla. Stir in flour, baking soda, baking powder and salt. Stir in chocolate chips and brickle chips.
Drop dough by rounded teaspoons onto ungreased cookie sheet. Make 9-10 minutes until lightly brown.

Monday, May 21, 2007

German Chocolate Cake III

Original recipe yield:
1 - 3 layer 9 inch cake
PREP TIME 30 Min
COOK TIME 30 Min
READY IN 1 Hr

INGREDIENTS

  • 1/2 cup water
  • 4 (1 ounce) squares German sweet chocolate
  • 1 cup butter, softened
  • 2 cups white sugar
  • 4 egg yolks
  • 1 teaspoon vanilla extract
  • 1 cup buttermilk
  • 2 1/2 cups cake flour
  • 1 teaspoon baking soda
  • 1/2 teaspoon salt
  • 4 egg whites

  • 1 cup white sugar
  • 1 cup evaporated milk
  • 1/2 cup butter
  • 3 egg yolks, beaten
  • 1 1/3 cups flaked coconut
  • 1 cup chopped pecans
  • 1 teaspoon vanilla extract

  • 1/2 teaspoon shortening
  • 1 (1 ounce) square semisweet chocolate

DIRECTIONS

  1. Preheat oven to 350 degrees F (175 degrees C). Grease and flour 3 - 9 inch round pans. Sift together the flour, baking soda and salt. Set aside. In a small saucepan, heat water and 4 ounces chocolate until melted. Remove from heat and allow to cool.
  2. In a large bowl, cream 1 cup butter and 2 cups sugar until light and fluffy. Beat in 4 egg yolks one at a time. Blend in the melted chocolate mixture and vanilla. Beat in the flour mixture alternately with the buttermilk, mixing just until incorporated.
  3. In a large glass or metal mixing bowl, beat egg whites until stiff peaks form. Fold 1/3 of the whites into the batter, then quickly fold in remaining whites until no streaks remain.
  4. Pour into 3 - 9 inch pans Bake in the preheated oven for 30 minutes, or until a toothpick inserted into the center of the cake comes out clean. Allow to cool for 10 minutes in the pan, then turn out onto wire rack.
  5. To make the Filling: In a saucepan combine 1 cup sugar, evaporated milk, 1/2 cup butter, and 3 egg yolks. Cook over low heat, stirring constantly until thickened. Remove from heat. Stir in coconut, pecans and vanilla. Cool until thick enough to spread.
  6. Spread filling between layers and on top of cake. In a small saucepan, melt shortening and 1 ounce of chocolate. Stir until smooth and drizzle down the sides of the cake.

Easy Ice Cream Sandwiches

Original recipe yield:
12 ice cream sandwiches
PREP TIME 20 Min
COOK TIME 10 Min
READY IN 1 Hr

INGREDIENTS

  • 1 (18.25 ounce) package chocolate cake mix
  • 1/2 cup butter, softened
  • 1 teaspoon vanilla extract
  • 2 eggs
  • 1/2 cup semisweet chocolate chips
  • 1/2 cup butterscotch chips
  • 1/2 gallon vanilla ice cream, softened

DIRECTIONS

  1. Preheat oven to 350 degrees F (175 degrees C). Lightly grease baking sheets.
  2. In a large bowl, mix together the cake mix, butter, vanilla extract, eggs, chocolate chips, and butterscotch chips. Roll dough into 2-inch balls and place them onto the prepared baking sheets. Bake for 10 minutes in the preheated oven. Do not overbake; the cookies should be set, but still soft. Let cool on the baking sheet for a few minutes before removing to finish cooling on wire racks.
  3. Using an ice cream scoop, mold the softened ice cream into a ball about the size of the cookies. Place scoop of ice cream between two cookies and gently press together. If you like a smooth edge, run the back of a spoon around the edge of the ice cream sandwich. Working quickly, fill all of the cookies, lay out on a baking sheet, and place in the freezer to harden. Serve when the ice cream has frozen solid. Sandwich cookies can be stored in a freezer bag for up to two weeks.

Friday, March 23, 2007

Cast Iron Cookware - Cooking Old School

Cast iron cookware is some of the best and most popular out there. It is definitely from an older school of design and use, but that definitely does not make it inferior to more recent models! It has long been a favorite choice of many groups, from long time housewives and mothers to independent chefs to serious campers and hikers.

Many people swear that food tests better out of this type of pan than any substitute. Cooking with cast iron is not held to just one group, either. Some of the dishes that are most commonly pointed to as being best out of cast iron include everything from Cajun seafood to Mexican style fajitas to any type of breakfast food. Even cornbread! Such a variety shows what can be done with this cookware.

Cast iron is popular for many different reasons. Unlike say stainless steel, it is an ideal heat conductor and will almost always heat evenly and consistently. It is relatively cheap in comparison with many other types of cookware, and with proper care can last multiple generations, a claim many other types of cookware cannot make.

It is easy to learn to use cast iron, and since you should preheat your cookware before using, you even get a head start on dinner preparation. One of the most popular methods of checking to know if the pan is ready is to drop a few (not many) drops of water on the pan. If the drops sizzle, then the pan is ready. If it disappears instantly, then you need to cool the pan down a little.

One important note: do not pour large amounts of cold liquid into a hot pan, since this is the one thing that can cause the cast iron to break.

Proper care of cast iron is most often referred to as "seasoning." This type of pan is unusual in that it is not supposed to be scrubbed often. Seasoning, instead, is when you embed oil and grease into the pores of the iron cookware, which prevents rust.

Seasoning is done by warming the pot or skillet, then rubbing a thin layer of shortening or corn oil all over the surface of the pan, inside and out. Afterward, lay the pot or skillet upside down inside a 350-degree oven. Most suggest one hour, while some other manufactures suggest as many as 4-5. The shortening will turn in to a non-sticky, hard coating. Allow the pan to cool overnight.

Cast iron retains heat effectively; so make sure to allow plenty of time to cool so you don't burn your hands. Seasoning should be repeated after each use of the cookware. As one downside: be wary of using acidic foods, which can deteriorate the seasoning, which makes the pan itself more vulnerable to rust and damage.

Wash cast iron in hot water only, and dry. Seasoning is always important, and you don't want to scrub unless absolutely necessary, because scrubbing will take away the layer of shortening that protects the pots from rust. If you have to scrub, then make sure you season the pan afterwards to repair its protective coat. Drying over heat is also important. It can be dried over an oven burner turned on low.

While the maintenance of cast iron may seem daunting, it is actually easy, and the high quality of food, affordability of pans, and ability to pass the cookware from generation to generation makes it a tough choice to beat.

Saturday, March 17, 2007

Wholesale Tea and Fine Dining – The Secret is in the Loo

Almost everyone enjoys a first-class meal in a four star hotel or restaurant; the memory of a fine dining experience is one that lasts.

With a friend or loved one spending 2-3 hours in a first-class establishment can mark an anniversary, promotion, engagement, birthday or any number of occasions that deserve remembrance. Sitting in a richly paneled dining room with soft light, low music, a fine wine and delicious food topped by world-class service and a breathtaking view is a very pleasurable experience. If the meal is prepared and served correctly, very few diners will object to the high cost of the meal—indeed, many people believe a higher price reinforces the quality of the meal.

The Market is Competitive:

Fine dining restaurants, whether they stand alone or are found in a four or five star hotel, face very stiff competition. Quality chefs and maĆ®tre d’s are paid generous salaries and bonuses and rating agencies like Zagat and the Washingtonian are constantly evaluating fine dining establishments; the loss of one’s rating can mean disaster.

The lodging industry is particularly competitive as hotels focus on customer service and satisfaction to discriminate their room offering from that of the competition.

Tea After the Meal:

World-class dining is an activity where attention to detail or lack of attention can ruin an otherwise good meal. If the service is slow or the food is not prepared perfectly, dissatisfaction is immediate particularly for high priced meals. Dissatisfied customers by word of mouth alone can damage an otherwise stellar reputation of a fine dining establishment.

One area that is often overlooked is the tea service at the end of the meal. Many restaurants offer the best coffee or espresso but overlook the serious tea drinker. Many restaurants end up serving a tea bag from a box with limited choices and then serve the bag in a cup of lukewarm water. High-quality tea must be steeped properly to ensure the proper preparation. In order to get the maximum out of tea steeping, whole leaf tea should be used; the taste and richness of the whole leaf is well presented during the steeping process.

Tea in bags, even whole leaf tea in bags, cannot compare to properly infused whole leaf tea. This is particularly true when the whole leaves have a chance to properly unfurl in a tea infuser instead of a cramped tea bag.

Tea bags are convenient and fast but many tea suppliers now offer large capacity or single service infusers and tea pots that not only provide the dining customer with quality tea but also can be private labeled with the brand of the hotel or restaurant.

Loose Leaf Tea is Gaining in Popularity

High-quality loose leaf tea is becoming more popular with fine dining restaurants and hotels as a way to complete the perfect meal and convince the customer that their presence is very much appreciated. The secret is a close arrangement between the restaurant as wholesaler and tea supplier as a provider of the highest quality loose leaf tea and teaware that will support the restaurant in serving its customers.

The Wholesaler – Supplier Relationship

The restaurant, as wholesaler, adds value by serving the best tea to its clientele as part of a perfect meal. The supplier serves the wholesaler by providing only quality products that are fairly priced with a substantial discount to encourage the wholesaler to carry its products. After-sale customer service on the part of the supplier is also critical.

It is not enough for the supplier to sell the products and walk away leaving the wholesaler to stand alone to deal with any potential problems. The wholesaler and supplier must cooperate with one another in order to satisfy a demanding fine dining market.

Sugary Sweet Emergency Recipe Substitutions or Ingredient Equivalents for Sugars and Molasses

It's a treat baking sweets, but running out of a crucial recipe ingredient can really gum up the works. Knowing an ingredient's "equivalent" or substitution can save the day. Many cake and cookie recipes can be adapted by using modern sweeteners if you don't have ingredients called for in vintage cookbooks or grandma's desert recipe. Today, Mom helps cooks in the kitchen with tips on granulated, brown, powdered sugars, and molasses.

Granulated Sugar - Most sugar is made from sugar cane or sugar beets. The plants are juiced, the liquid is boiled several times to separate out the molasses and the remaining clear liquid is crystallized into the familiar white granules on our tables. If you don't have 1 cup granulated sugar use 1 cup packed brown sugar OR instead of 1 cup granulated sugar use 2 cups powdered sugar.

You can also substitute sweet syrups for granulated sugars, but you'll need to remove some of the liquid in your recipe to maintain the correct moisture level. If you are baking it helps to add a leavening agent like baking soda. If you don't have the soda and you are not baking, then you can probably leave it out and still be ok. But this may effect texture and cooking times, so keep a closer eye on your creation.

If you don't have 1 cup granulated sugar use 1 cup honey + 1/4 tsp soda and reduce the liquid in the recipe by 1/4 cup. Honey is sweeter than granulated sugar. Or, instead of 1 cup granulated sugar use 1 1/2 cups molasses plus 1/4 tsp baking soda and reduce the liquid in the recipe by 1/4 cup. 1 pound (package) granulated sugar = about 2 1/4 cups granulated sugar.

Powdered Sugar - Superfine or powdered sugar is granulated sugar that has been spun into a powder. Used for a slightly smoother texture especially in frostings and fluffy meringues. When measuring you'll need slightly more powdered to make up for its fine grain. If you don't have 2 cups powdered sugar use 1 cup granulated. 1 pound (package) of powdered sugar = about 3 1/2 cups powdered sugar, unsifted (not packed).

Confectioner's Sugar - Confectioners sugar has been processed past the powdered sugar phase, into an even finer powder. Today the terms are used interchangeably, so check your packaging.

Brown Sugar - Brown sugar or sugar in the raw, has slightly more brown syrup, or molasses than white granulated sugar and is slightly less sweet. As a result, brown sugar has a smokier flavor and darker color. Golden brown sugar has less molasses than dark brown sugar. The two can be used interchangeably, but note the darker sugar will have a richer flavor and color and is generally better if you're cooking pork.

If you don't have brown sugar use granulated sugar instead using the exact same measurements. You can also make brown sugar by combining 1 cup sugar with 1/2 cup molasses, but this may throw off the liquid in your recipe, so be careful using this substitution when baking cakes.

Brown sugar will remain soft if it is kept in an airtight container. To soften brown sugar place it in an ovenproof container and warm at 250 degrees until soft, or microwave on high for 30 seconds at a time until soft. Use it immediately as it will be harder than before when it cools! A 1 pound package of brown sugar equals about 2 1/4 cup firmly packed brown sugar.

Molasses - Molasses has a dark, sweet, smoky taste. It is created during the sugar refining process. Molasses is slightly less sweet than granulated sugar. Until sugar prices fell in the 1930's molasses was the primary sweetener in American kitchens. Sulphur dioxide is sometimes used to make molasses sweet. The term 'unsulphured molasses' just means sulphur was not used in the creation of your molasses and it should be the lightest and sweetest type. Measuring molasses is easier (and more accurate) if you grease the measuring cup first with a little cooking spray or butter. One 12 fluid ounce jar of molasses equals 1 1/2 cups. One cup equals 8 fluid ounces.

If you are making a vintage recipe I heartily recommend you spring for a jar of molasses. Molasses is the secret ingredient in many cookies, cakes, ham glazes and BBQ sauces. Granulated sugars will not taste the same. If you have a jar left over, you can use molasses in baked beans, ham, oatmeal, ice cream or added to syrup and butter on pancakes. One tablespoon of molasses provides 8% of your daily recommended iron and 4% of your calcium!

One cup of molasses equals1 cup honey. Bear in mind honey is sweeter than molasses and will change the flavor slightly. OR instead of 1 cup of molasses try 3/4 cup granulated sugar (brown is preferable) plus 1/4 cup water. The extra water (or other liquid) is called for to make up for the moisture in molasses. It is important to replace it if you're baking cakes or breads. Blackstrap molasses is the thickest, darkest and least sweet type of molasses and isn't recommended for baking.

Sugar Baking Tip: Baking relies on a bit more science than your average frosting recipe. Not only do the ingredients add flavor, they may also serve a specific function like making your cake rise, or binding ingredients together. For best results when baking, measure all your ingredients accurately; like leveling off your measuring cup with the edge of a knife and setting the cup on the counter when measuring liquids. When you resort to a substitution just be aware that your texture or flavor may be slightly different. For more of Mom's kitchen tips and apron humor visit her on the web at http://www.MomsRetro.com. Good luck and happy cooking!

Friday, March 16, 2007

How To Make Of Soup Preparation Something Easy

How to make of soup preparation something easy

Feel free to create as you wish! Use any combination of vegetables you want and to make a complete meal of a soup, just cut up any leftover (ccoked) meats and add at the last minute. If you have some frozen shrimp in the freezer, you can always cook them at the last minute by throwing them into the soup and leaving them to cook until they are no longer see-through. Then serve at once.

Three of the simplest techniques:

1. Basic Cream of Vegetable Soup.

Peel, wash and cut in big chunks any vegetable(s) that you want. Cover the vegetables with enough salted water (about 2 quarts of water to 2 teaspoons of salt) to cover them by an extra inch. Bring to the boil on high heat, cover with a lid, turn down and slowly boil for about 40 minutes (or until vegetables are soft all the way through). Remember, the thicker the chunks, the longer the cooking time.

Then blend by putting a handheld blender directly into the pot and blending the vegetables. The longer you blend, the smoother the soup. Add a little half and half or heavy cream if you wish. Some suggestions for soup ingredients are: the whites of leeks with zucchini in about equal quantity, cauliflower by itself or with another vegetable, edible pumpkin (found in Spanish markets), any kind of squash and frozen green peas, potato etc. Onions are always good in almost any soup along with the main vegetables but not as the main ingredient, just one small one. Experiment for yourself and see what you and your family enjoy.

2. Better-Tasting Cream of Vegetable Soup

Using the same suggestions as given above, the tastier soup takes a little more time and 1-2 tablespoons of olive oil or butter. Peel, wash and cut in big chunks any vegetable(s) that you want. Saute for 3-5 minutes in a little oil, olive oil or canola oil or a blend of the two or butter. Make sure that you don’t brown the vegetables, as it will change the taste.

Put in a pot with water (enough to cover vegetables by an extra inch) and salt (and pepper if you like). Bring to the boil and turn down to a slow boil and cook for about 40 minutes (or until vegetables are soft all the way through). Remember, the thicker the chunks, the longer the cooking time.

Then blend by putting the hand blender directly into the pot and blending. The longer you blend, the smoother the soup. Add a little half and half or heavy cream if you wish.

3. Chunky Vegetable Soup.

Peel, wash and cut in small chunks any vegetable(s) that you want. (If you want to make minestrone, use zucchini, carrots and at least two other vegetables that you want, usually making sure that one of the cabbage family is represented, like cauliflower, broccoli, cabbage or even just the leaves or well peeled stalks or these vegetables.

Sautee (in a pot) for 3-5 minutes in a little oil, olive oil or canola oil or a blend of the two or butter. Make sure you don’t brown the vegetables as it will change the taste.

Add enough water to cover the vegetables by an extra inch and salt (about 1 tsp per quart) and pepper, if you wish. Bring to the boil and then turn down to a slow boil and leave to cook for about 40 minutes (or until vegetables are soft all the way through). Remember, the thicker the chunks, the longer the cooking time. Add a little half and half or heavy cream if you wish, just before serving.
Jean-Louis Vosgien as a food consultant has created numerous recipes for restaurants in many countries.
www.photos-and-recipes.com

Baking Cakes - Creative And Fun Ideas For The Whole Family

I love to bake! I came on the internet looking for new ideas and recipes that I could share in the fun with my children. My boys love to crack the eggs, use the mixer and fight over the beaters! We have all been there. As a child I love to like that mixing tool. And a secret…, I still sneak some baking in after the boys go to bed just so that I get a chance to indulge. I enjoy making cupcakes. After the fight is over and the cupcakes are in the oven we mix up the icing. We make a bunch of different colours. Once the cupcakes cool, we have a decorating party. The boys enjoy this part. They usually eat the icing instead of putting it on the cupcakes. It is so enjoyable to watch the boys use their artistic skills. We also make tones of memories. I am now venturing into a new cake. It was my sisters 35th birthday and I made my first shaped cake. I did not use a “pre made” tin. It was all free hand. I made a wine bottle. I used a rectangle baking dish for the bottle and a loaf pan for the neck of the bottle. I cut it into the shapes needed and trim the edges to make it look like a bottle. I also filled it with cherry filing. You will need glue to keep all the parts together, which I used the icing. After it sat in the refrigerator overnight to harden a bit, I use the icing bag with a Wilton tip #18 to decorate it. It took about two hours to decorate it. It was a lot of fun. To see a picture please visit my blog page. There are a lot of websites on the internet that can help you give your cupcakes and cakes the extra touch that they may need. I have found sites where you can purchase accessories for your cakes. This helps me get my creative juices flowing. These products are inexpensive as well. I also found that it is less stressful to bake if you have the right tools ie: icing bags, tips, icing knifes and all the eatable decorations close by. I am no pro at the art of baking. But I was quite surprised by what I was able to do. My husband has volunteered me to make all the birthday cakes for our family members. For my birthday, the request will be an ice cream cake… my favourite! They are so easy to make. Two quick suggestions for the ice cream cake… 1. You need to work quickly and 2. Make sure that the kids are in bed or there will be no ice cream left for the cake. You can always start with a vanilla base and add anything to it like smarties, oreo cookies, nuts, fruit, etc. There are endless recopies for the ice cream cake. So if you want to bring joy to your children’s heart and make great memories with your family I challenge you to get your fingers covered in fun and try your hand at “creative cupcakes” and “funky cakes”. Let your inner child out and your imagination run wild. THE POSSIBILITIES ARE ENDLESS!!

Why Drink Green Tea – Three Reasons To Enjoy A Popular Beverage

After water, tea is the most consumed beverage in the world and there are good reasons for this popularity. One of the most popular forms of tea is green tea and there are a number of reasons why so many people enjoy this beverage.

First, green tea is flavorful and there are many varieties of green tea. The difference between teas is the amount of oxidation that the leaves are exposed to. Green tea is not oxidized meaning the enzymes in the tea leaf are not exposed to any oxygen found in the air. By contrast, black tea is fully oxidized and oolong tea is partially oxidized. When dealing with tea taste is a matter of degree and a function of oxidation.

Green tea comes in many forms and blends and is popular in every country and culture. Originally produced in China, the consumption and popularity of green tea spread throughout Asia, India and the western world. With the addition of flavors and blends like Jasmine, Vanilla, Mint and varieties like Jasmine pearls, Sencha and Gunpowder, green teas are subtle and appeal to the varied tastes of tea drinkers.

Green tea has a unique light taste that appeals to a very large number of drinkers throughout the world and has been popular since tea was first discovered over 5,000 years ago. It is one of the five basic types of tea and is recognized by even the most novice tea drinker.

Second, loose leaf green tea has been one of the mainstays of the tea culture. The highest quality tea is loose tea and premium quality loose tea has gained in popularity in recent years. Green tea drinkers enjoy preparation rituals and ceremonies that add ambiance to the tea drinking experience. Whole leaf green tea has served as the basis of tea rituals in China and Japan and, properly served, the tea ritual provides a pleasant experience after a stressful day.

When China was the sea power of the world (1405-1433), tea was among the indispensable supplies for the seamen. The amount of vitamin C in the tea drink consumed by the seafarers at that time was enough to prevent scurvy which would kill many European sailors more than 100 years later, but was essentially unknown to the medical officers assigned to the fleet of more than 27,000 men on their round voyage from China to Africa.

Lastly, there are strong indications that drinking green tea (and all types of tea for that matter) is very healthy for the human body. Throughout the years tea has been prized for its medicinal qualities and the consumption of tea became a regular event for most families.

Tea has been used in China as a medicinal beverage to promote health in mind and body for about 5000 years. The earliest known reference to tea as a health aid dates back to 2737 B.C. Tea was an expensive beverage in ancient China. Its use was confined to the wealthy segments of the population. Only in the Ming dynasty after the fall of the Mongolian empire in 1368 A.D., tea drinking spread from the elite to the populace. The first shipment of tea to Europe in 1606 by the Dutch East India Company was green tea

In 1994 the Journal of the National Cancer Institute published the results of an epidemiological study indicating that drinking green tea reduced the risk of esophageal cancer in Chinese men and women by nearly sixty percent.

University of Purdue researchers recently concluded that a compound in green tea inhibits the growth of cancer cells. There is also research indicating that drinking green tea lowers total cholesterol levels, as well as improving the ratio of good (HDL) cholesterol to bad (LDL) cholesterol.

A recent Japanese study, reported by the Journal of the American Medical Association (JAMA) reported that adults in Japan who drank more green tea had a lower risk of death from all causes and from heart dis¬ease.

In addition, compounds in green tea called polyphenols have been much studied for possible heart disease and cancer preventive effects. Although further study may be required to prove absolutely that green tea produces measurable health benefits, the consumption of green teas throughout history add credence to recent medical claims.

Making Tea 1 - How to Brew a Great Cuppa

It is amazing how few people know how to brew the kind of refreshing, invigorating tea enjoyed by the English-speaking world for a couple of centuries. This is by far the best way for strong black teas such as Assam from India, Ceylon from Sri Lanka and blends like English Breakfast.

These teas are dark in colour with a strong tea aroma and are made up of small pieces of broken leaf. They have been withered and air-dried to develop the distinctive colour and flavour, which gives them a high content of the stimulants theophylline and caffeine. They must be infused with really boiling water for a short time, and develop a very unpleasant bitter or stewed flavour if brewed too long.

The critical factors are quality equipment and materials, cleanliness and maximum flavour extraction. That means you must have really hot water and stir the pot! The method given here is simple and reliable, but can always be varied to suit individual tastes.

You will need:

  1. Good quality, fresh strong black tea
  2. Heavy china teapot with a good spout
  3. Fresh, clean, soft water
  4. Kettle, electric preferred
  5. Tea strainer, stainless steel with fine mesh preferred
  6. China cups or mugs, preferably 200ml or larger
  7. Skim or low fat milk (optional)
  8. Tea cosy to keep teapot warm (optional).

I have not mentioned lemon, sugar or teaspoons since these are all quite unnecessary to enjoy good tea. The teapot, kettle and strainer must be clean as any residues from previous use will affect the flavour.

How to proceed:

  1. Put the water on to boil: about 1 cup (250ml) per person, plus 1.
  2. Pre-heat the teapot by pouring a little very hot water in it from the kettle, just before the water boils. The teapot should feel very hot to the touch.
  3. As the water reaches the boil, pour the hot water out of the teapot.
  4. Add tea to pot: one good, heaped teaspoonful (about 4g) per person, plus one “for the pot”.
  5. Pour the boiling water directly onto the tea.
  6. Stir vigorously with a spoon. Most of the flavour is extracted during these first few seconds, so this step is crucial.
  7. Leave to stand for 3-4 minutes. Any longer and the tannins will start to be extracted, giving the tea that woody or stewed flavour. Cover teapot with tea cosy if room is cold or draughty.
  8. Pour a small quantity of skim milk into each cup (if liked). About 1 tablespoon or 20ml is enough. If there is only full cream milk, use less.
  9. Pour the tea into each cup using the strainer to catch leaves (there should be a few).

All the tea should be poured at once, leaving a little in the pot. Second cups are never as good as the first, so aim to make that first cup large enough!

The tea as poured should be a deep coppery brown, and even with milk added should be a rich coppery brown rather than milky white. The tea in the cup (or mug) should be drinkable for 20 minutes or so, and this time can be extended by covering the cup with a lid.

For a variation, use twice the amount of tea and an even shorter brewing time. This stuff has a real kick! Enjoy!

Thursday, March 15, 2007

Creating A Quality Pizza

More than 90% of Americans consume a slice each month, but do we get what we are looking for? What is it? Pizza, the industry that produces more than $30 billion on a yearly basis. So do you know if the slice of pizza your consuming is up to par?

Isn’t it what all pizza lover’s are looking for? A quality pizza! So let’s take a look at what makes a quality pizza. A quality pizza is a pizza that produces three unique qualities. First is appearance, if it doesn’t look good then how do you think it is going to taste? The appearance of a quality pizza should have correct topping distribution. This means toppings over the whole pizza, no center loading. Center loading is when the majority of your toppings are in the center of your pizza, this often results in a doughy pizza. Another aspect of correct toping distribution is the amount of toppings on the pizza. This means that the more pizza toppings you order, the less you get. It sounds harsh, but it really isn’t. Please read on and I’ll explain why.

The baking of the pizza is the second unique quality of pizza appearance. The bake of a pizza is vital, consumer’s aren’t looking for a doughy pizza or a pizza with a burnt appearance, consumer’s want their pizza baked just right! Here is a little insight on how they achieve the proper bake of a pizza. The bake of a pizza depends on a few things, proper bake time, temperature, and toppings. Pizza shops spend countless hours every year perfecting the correct bake time and temperature. Time and temperature should be checked on a regular basis because they always need an adjustment tweak here and there. The adjustments could be due to the in store temperature, weather, cleanliness of the oven or thickness of toppings. I believe the most important aspect of the bake is toppings! Every pizza topping has a proper amount that should be placed on a pizza, but when you order multiple toppings, it would be impossible to place that single topping amount on the pizza simply because it wouldn’t cook properly. To give you a visual, think about this: An order is placed for a pepperoni pizza and let’s say that the proper topping spec. for a 1 topping pepperoni pizza is 50 pepperonis. With the proper amount of pepperonis on that pizza, it would cook properly. Now lets say there is an order placed for a 4 topping pizza; pepperoni, sausage, onion, and mushrooms. If a pizza shop used the 1 topping spec for all 4 toppings, the pizza would be to thick to cook properly. The end result would either be a doughy pizza or a very well done pizza because the pizza shop would have to bake it longer to try and cook the pizza the whole way through. In order to have a proper bake on a 4 topping pizza, the pizza shop would need to cut back the topping amount around 20%.

The final aspect for the quality pizza, is the taste.

It’s want we all want, a great tasting pizza. We all have our favorite pizza shop that we order from. Why? Is it because it actually taste good or is it because of the appearance of the pizza? We are all unique and we all have our own taste and desires, but it may just be that physiological thing we also have. If you see a pizza that is perfectly created and appeals to your eye’s, most of the time it is going to taste good! That is why all pizza shop’s place a strong emphasis on appearance of their product. When it simply looks good, it’s going to taste good! Yes, it is true, there are many pizza shops that have a great tasting product, that may not look superb, and you know who they are! The decision is up to you, so let’s all grab some pizza coupons and call our favorite pizza shop for that 30 minute meal!

Microwave Cooking Tips - Cooking Microwave Meat

As a busy individual, the least that you would focus your spare time to is cooking your meal. Going through drive-through fast foods will not usually equal the home-made cooking that you can get. If only you have sufficient time to attend to the busy preparations in cooking. As you know, cooking meat can be a really taxing work especially if you lack adequate time for this thing. So what is the microwave doing? Don't just let your microwave oven sulk in one corner of your kitchen. Make use of it and cook your meat!

Cooking meat in the microwave oven? This can be a big NO for most people. They will oppose to this idea, so to speak. Their reason will usually be the same as their usual claims that the chicken meat can eventually end up feeling like a rubber and that the ground beef will not be entirely cooked. But these things can be a myth after all! Why so? Because if only you know of the microwave cooking tips for meats, you will not say the same thing. The secret i know the right types of cooking utensils to be utilized!

There are clamors against the use of plastic materials in cooking food inside the microwave. Yes, there are those unsafe plastic utensils which may be harmful for the meat that you cook. It is because some of the plastic containers include certain chemicals in their overall make-up which get triggered due to a high rate of heat in the surroundings. In turn, these chemicals will get mixed up with the food inside the microwave oven. Again, as emphasized earlier, one of the effective microwave cooking tips for meat is to employ only the proper utensil. There are basically containers which are obviously designed for microwave cooking.

One safe microwave cooking utensil to be used is the Tupperware. If you are sure that the container which you are about to employ is fit for microwave use, then you can be guaranteed that no sorts of chemicals can get activated although there is too much heat inside the microwave oven. One utensil again, the Oval Cooker, is particularly styled in a way that the meat moisture is kept so that the meat does not end up to be rubbery and dry.

When you are cooking beef remember to cook each pound beef for about 6 minutes, and let the meat wait a few minutes before you take it out. When cooking a whole chicken the cooker must be filled in with half cup of water in the bottom part, and like the beef it take about 6 minutes for each pound. This time can be different in some microwaves depending their power.

As opposed to the prevailing opinion that it's not possible to cook food in microwaves, you find out that you can, but there is a few cooking ways & instruments that can help you achieve this goal, try it first with small amounts of meat and after a few times you will be able to cook the meat exactly in the way you like it. From this point it will be easy for you to make your meal using this tip and impress all you friend and family.

Charcoal Or Gas Grilling - Which Is Better?

Summertime just isn't the same without a backyard barbeque. If you are considering buying a grill you might be wondering which type to get. You can get a gas grill, a charcoal grill or a smoker. There are many things to consider when you try to make your decision. Keep reading and learn the advantages of each.

The most common grill nowadays is the gas grill. Powered by propane gas this type of grill has many advantages. The biggest benefit is the convenience factor. Gas grills are ready to go almost instantly and cook food fast. This type of grill makes it convenient to cook on almost all of the time. The disadvantage to a gas grill is that it adds no flavor to your food. You do not get any of the flavor of a charcoal or wood burning grill.

The next type of grill is a charcoal grill. The great thing about this type is that you get more flavor in your food from the wood or charcoal. It is also more traditional and may bring back family memories from your past. The downside to the charcoal grill is that it takes longer. You have to preheat the coals or wood before using it.

The last type of grill and my favorite is the smoker. Smokers have all of the same benefits of a charcoal grill but they can also be used to smoke meats. There is nothing better than a brisket that has been in a smoker for 6 hours. Smokers have all of the same negatives as a charcoal grill however so they do require more time.

Whichever type you decide I am sure you will be happy. Just be careful and shop around for the best deal. Prices can vary greatly from store to store. Pick a grill that is reasonably priced but not cheap. Like everything else, you get what you pay for.

Magical Cakes For St. Patrick's Day

Lucky Leprechaun's Hat

This design calls for a dome cake and a slightly wider, round cake layer. If you don't have a dome cake mold, use an oven-safe glass bowl.

Torte and fill the dome cake. Using green tinted buttercream, ice the round cake. Before the icing crusts, place the dome on top and ice it.

Give the leprechaun's hat a wide band that you create with chocolate buttercream or a ribbon of chocolate fondant. To pipe the hatband, you can use a strip of evenly cut paper to create an imprint, and then, using a star tip, fill in the band.

Next, pipe a gold buckle (with orange-yellow icing) onto the hatband. For a magical touch, apply edible gold glitter to the buckle.

Note: While edible gold glitter isn't cheap, you can find some good deals online. Large craft stores such as Michael's may also carry this.

Then pipe a large shamrock onto the hat. If you'd rather not do this freehand, make an imprint by pressing lightly onto the icing with a shamrock cookie cutter. Then using a start tip and dark green icing, fill in the shamrock. For an extra festive touch, serve with Irish Coffee.

Here's what one reader had to say about our "Cake Decorating Made Easy!" Video Books:

"This is a must have for all your cake decorating needs. They go over the basics in easy 'layman's' terms...very detailed. Great asset to anyone's cake decorating library."

Betsy Jacob, Fulton, MO

And here are more decorating ideas for magical St. Patrick's Day cakes:

  • Create a character cake with an easy-to-use character pan decorating kit, except add a St. Patrick's Day variation: whip up some green buttercream and add some leprechaun mischief like a green bow tie and shamrocks.
  • Decorate a sheet cake with an "end of the rainbow" scene. Ice the cake with pastel blue for the sky and green for the emerald meadow. Pipe tufts of green grass. Then using an icing bag, round tips and buttercream, decorate with a rainbow, white clouds and a pot of gold. Pipe gold nuggets and sprinkle with edible gold glitter. If you enjoy modeling with marzipan or sugarcraft, create a three-dimensional pot of gold filled with little gold wrapped candies. Then pipe a St. Patrick's Day message. Highlight with edible gold glitter. Finally add leprechaun figurines, store bought or sugarcrafted.
  • Create a pot of gold cake. Ice a round cake or an upside down dome cake with yellow buttercream. Craft or purchase a rainbow arch that you can set up on the cake. Model nuggets and coins with marzipan or fondant, and then coat with edible gold glitter. Lavishly decorate the top of the cake with these.
  • Bake an Irish Coffee cake and liberally top with freshly whipped cream. Decorate with shamrock cake confetti and leprechaun party picks. Serve immediately.
  • Create a charming cake, literally. Purchase Irish good luck charms, one for each guest. Thread each charm onto a clean, green ribbon. Bake an angel food or bundt cake and glaze. Drop the charms inside the center of the cake, and drape the ribbons over the cake. Before slicing, each guest draws a charm.
  • Alternatively, charms can be added as they often were to Victorian wedding cakes. To do so, bake round cakes. While filling, place the charms around next to the edge before placing the top layer. Allow the ribbons to emerge over the sides of the cake. After the cake is presented, each person pulls a charm out.
  • Remember the green when selecting a cake recipe. Use white or yellow so that it can be easily tinted green. You might even want a green filling such as pistachio pudding. Not nuts about pistachio? How about key lime?
  • · Bring a wee bit of Irish charm to your cupcakes. Buy a box of Lucky Charms cereal (this magical leprechaun has been entertaining at breakfast tables for over 40 years!), pour into a large bowl, and take out all of the marshmallow charms (you have permission!). After frosting the cupcakes with pretty swirls of green buttercream, decorate with the magical four leaf clovers, blue moons, shooting stars, leprechaun hats, purple horseshoes and pots of gold.

Finally, here's a Cake Decorator's version of the Irish Blessing for you:

May the road rise to meet you, May the wind be always at your back, May all your cakes bring a smile to your face!